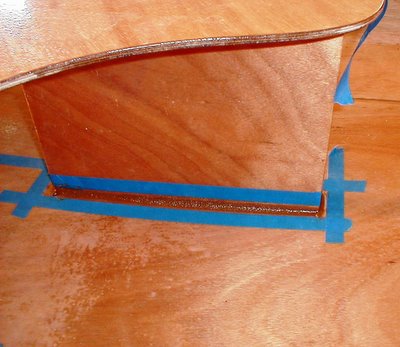
 The DB trunk/mid seat unit was removed once again. A small pilot hole was drilled through the bottom to mark the DB slot location from the bottom exterior. Then a batch of peanut butter thickened epoxy was mixed up (the whole job ended up needing two batches, a total of 8 pumps from each epoxy dispenser). Using the Zip-loc "pastry bag" dispenser, a bead of epoxy was applied to the bottom face of the DB trunk, where it would contact the hull. The unit was then returned to its position using the felt tip marker orientation marks, and clamped in place. Then, a bead of epoxy was applied the junction of hull and bulkhead for all three parts. The resulting bead was shaped to a clean fillet with a tongue depressor, and excess carefully removed with a rag, or a clean edge of the tongue depressor. After the epoxy partially sets in a few hours, Ill go back to smooth things over, and remove the masking tape. Total hours 57.50.
Tampilkan postingan dengan label fillets. Tampilkan semua postingan
Tampilkan postingan dengan label fillets. Tampilkan semua postingan
Rabu, 16 Maret 2016
Bulkhead fillets
The DB trunk/mid seat unit was removed once again. A small pilot hole was drilled through the bottom to mark the DB slot location from the bottom exterior. Then a batch of peanut butter thickened epoxy was mixed up (the whole job ended up needing two batches, a total of 8 pumps from each epoxy dispenser). Using the Zip-loc "pastry bag" dispenser, a bead of epoxy was applied to the bottom face of the DB trunk, where it would contact the hull. The unit was then returned to its position using the felt tip marker orientation marks, and clamped in place. Then, a bead of epoxy was applied the junction of hull and bulkhead for all three parts. The resulting bead was shaped to a clean fillet with a tongue depressor, and excess carefully removed with a rag, or a clean edge of the tongue depressor. After the epoxy partially sets in a few hours, Ill go back to smooth things over, and remove the masking tape. Total hours 57.50.Jumat, 26 Februari 2016
Interior fillets and glass
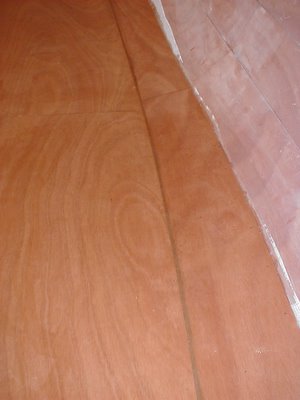
 Just ahead of a possible rare snowfall in the Birmingham area, I finished the job of glassing the interior of the boat. The first step was to apply a fillet of wood flour-thickened epoxy to the joint between the bottom panel and the first strake. This filled the gap that existed in some spots, and also created a smooth radius to accommodate the glass cloth. This had to be done carefully and neatly, since it will be visible underneath the cloth and the bright (varnished) finish that will be used in the interior. With the fillet freshly applied, the cloth was laid over the bottom and first side panel and wrinkles were smoothed. At the beam, the cloth is just wide enough to cover. At this point, the unthickened epoxy was mixed, poured, and carefully spread and worked into the cloth. Wrinkles and bubbles were worked out, and the result was satisfactory. I found that I had to keep a watchful eye especially on the joints and stitch holes, as new air bubbles kept appearing underneath the cloth. These are easily removed, but more kept appearing for an hour or so before everything became saturated. In a couple of hours, the epoxy will reach gel stage, and the excess cloth can be trimmed off, as before on the exterior. The third photo below below shows a closer view of the fillet and glassed bottom. For a novice, a decent job. Total hours 46.25.
Langganan:
Postingan (Atom)