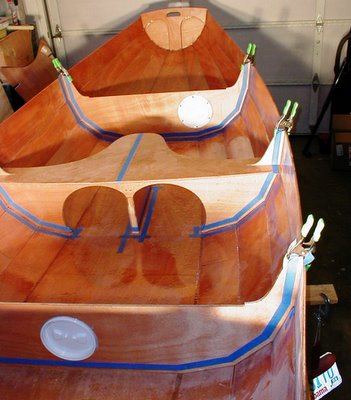
 On a chilly winter morning in central Alabama, a novice boatbuilder of Polish decent drank coffee from Sumatran beans as he worked on a boat of Norwegian, er, Swedish (make it Scandinavian) design made of mahogany grown in west Africa, milled in France to British quality standards, and cut in Maryland, all while watching a frantic gold medal Olympic hockey game played in Italy by teams from Finland and Sweden. Who says the world isnt interdependent?
After some scuff sanding yesterday at the positions for the bulkheads, I placed the three bulkheads in place for their permanent installation. Particular care was given to the center seat/daggerboard trunk unit to get the trunk aligned with the center line of the Passagemaker dinghy. Using an L-square, I laid down a strip of tape on the top surface of the center seat parallel to the centerline of the daggerboard trunk. This allowed me to align the unit with a string line running down the center of the hull. Fore and aft position was placed with measurements from the bow as specified in the instructions. The forward and aft bulkheads were placed in position with the help of the seat surfaces. Fitting the bulkhead "ears" through the slots in the seat, then positioning the seat with its respective transom put the bulkhead in position. The forward bulkhead angle relative to the bottom panel was adjusted with the help of the mast step support, which will be epoxied in place later. Since its angle with the bottom panel isnt 90 degrees, the stern bulkhead was adjusted to be roughly parallel to the stern transom. All three parts were clamped in place, and fit fairly well without further manipulation.
Then, along the joints that will soon be filleted with peanut butter epoxy, masking tape was laid down to keep a neat edge. I also made a few position marks with a felt tip marker to record the positions of the parts, in case anything gets shifted. In fact, the center unit will come out again so I can drill a small pilot hole to mark the interior of the DB trunk through to the exterior bottom hull. Also, epoxy will be applied to the surfaces of the DB trunk bottom, where they contact the hull. This joint will be one of the most critical to make strong and waterproof.
So, with the prep work done, it is time for a break. And another cup of coffee. Oh, and Sweden won the game, 3-2. Total hours 56.00.
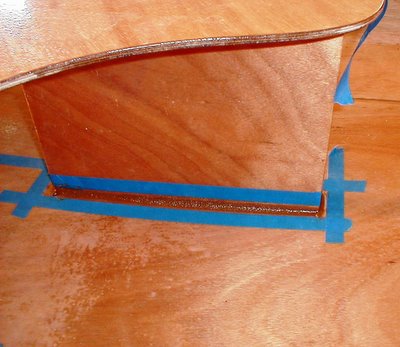 The DB trunk/mid seat unit was removed once again. A small pilot hole was drilled through the bottom to mark the DB slot location from the bottom exterior. Then a batch of peanut butter thickened epoxy was mixed up (the whole job ended up needing two batches, a total of 8 pumps from each epoxy dispenser). Using the Zip-loc "pastry bag" dispenser, a bead of epoxy was applied to the bottom face of the DB trunk, where it would contact the hull. The unit was then returned to its position using the felt tip marker orientation marks, and clamped in place. Then, a bead of epoxy was applied the junction of hull and bulkhead for all three parts. The resulting bead was shaped to a clean fillet with a tongue depressor, and excess carefully removed with a rag, or a clean edge of the tongue depressor. After the epoxy partially sets in a few hours, Ill go back to smooth things over, and remove the masking tape. Total hours 57.50.
 The stern bulkhead was stitched into place tonight, with considerably less difficulty than the middle one last night. This completes the stitching for a while. With a three day holiday weekend ahead, I will be flipping the hull over. Thickened epoxy will be applied to the joints between all the strakes to seal up the hull. Then the wire stitches can be removed, and the tiny holes can be sealed up. After all, no boat floats for very long with hundreds of little holes in it. Following the removal of the stitches, the bottom is glassed. That will be a whole new experience. Total hours 32.50.
 Tonight I wired in the middle bulkhead. This was more of a job than the bow bulkhead yesterday. The port side strakes didnt want to form up tightly to the shape of the bulkhead, and several extra stitches and some muscle was needed for a good fit on that side. But several broken stitches later, things seem pretty close to being in place. Some further tuning might be needed before I start sealing the joints between the strakes this weekend. Total hours 31.75.